Cozy Corn on the Cob: A Golden Gem of Summer
Ah, sweet corn on the cob! As summer whispers its final, sun-kissed goodbyes, nothing captures the essence of the season quite like the tender, juicy bites of freshly-picked corn. Each nibble brings memories of backyard barbecues, joyful gatherings, and lazy afternoons spent soaking up the warmth of the sun. Growing up, the anticipation of corn season was palpable; my family would race to the local farmer’s market as soon as it opened, baskets in hand, ready to scoop up the sweetest, freshest corn they had to offer.
This delightful recipe for Corn on the Cob transforms simple ingredients into a comforting treat that warms the heart and fills the belly. Perfect for an easy weeknight dinner or a weekend family gathering, this recipe is as nourishing as it is delicious! This is one you’ll definitely want to pin for later!
Why You’ll Love This Recipe
- Quick and easy: With only a few simple steps, this recipe can be whipped up in no time, making it perfect for busy weeknights.
- Flavorful comfort: Slathering warm, tender corn with creamy butter and a sprinkle of salt creates a mouthwatering experience that everyone will enjoy.
- Seasonal delight: Fresh corn on the cob celebrates the flavors of summer and is ideal for potlucks or backyard barbecues.
- Kid-friendly fun: Watching the corn sizzle in the pot and taking turns buttering the cobs makes for a delightful family activity!
- Customizable toppings: Whether you like it classic or crave a bit of creativity, this recipe can be easily dressed up with exciting flavors and toppings.
Gather These Simple Ingredients
- Fresh corn on the cob
- Butter
- Salt
Let’s Make It Together
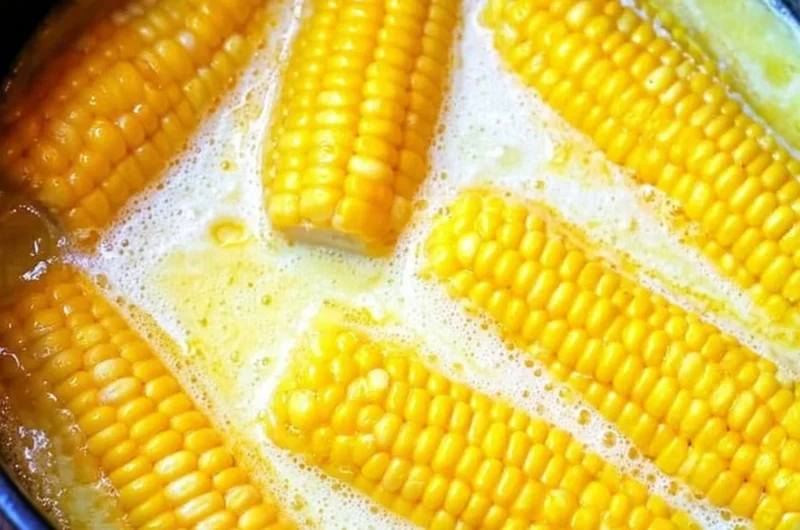
- Bring a large pot of water to a boil — the kind of rolling boil that makes your kitchen feel alive.
- Add the corn and cook for about 5-7 minutes until tender, filling your home with that unmistakable sweet aroma.
- Remove the corn and let it cool slightly, watching the steam curl away in the warm sunlight.
- Slather with melted butter and sprinkle generously with salt before serving, indulging in that creamy goodness.
Variations & Creative Twists
Feel free to play around with your corn on the cob! Here are a few scrumptious ideas to elevate this delightful dish:
- Zesty Lime Butter: Mix softened butter with lime zest and a splash of lime juice for a refreshing twist that brightens each bite.
- Parmesan and Garlic: Top your corn with melted butter, freshly grated Parmesan cheese, and minced garlic for a rich, savory kick.
- Spicy Sriracha Drizzle: For those who enjoy a kick, add a drizzle of Sriracha and a squeeze of lemon juice over your buttered corn for an indulgent flavor boost.
- Herbed Butter Spread: Combine softened butter with chopped fresh herbs like parsley, chives, and basil for a vibrant, garden-fresh experience.
Chef Emma’s Helpful Tips
- Make-Ahead Advice: You can prep your corn ahead of time. Simply cook it in advance and place it in ice water to stop the cooking. When you’re ready to serve, just reheat it briefly in hot water.
- Ingredient Swaps: For a dairy-free version, try using your favorite plant-based butter alternative!
- Better Butter: Make sure your butter is softened to room temperature for easy slathering. You could even try infused butter with garlic or herbs for extra flavor.
- Perfect Storage: Leftover corn can be stored in an airtight container in the fridge for up to three days. Reheat it in warm water to keep it tender!
Calories & Nutrition Details
- Serving Size: 1 corn on the cob
- Calories: 90
- Carbohydrates: 19g
- Sugar: 2g
- Fat: 4g
- Protein: 3g
- Sodium: 75mg
Frequently Asked Questions
Can I make this ahead?
Yes! Prepare the corn in advance and store it in ice water to keep it fresh until you’re ready to serve.
Can I use different ingredients?
Absolutely! Feel free to customize toppings or try different butters and flavorings to suit your taste.
How do I store leftovers?
Store leftover corn in an airtight container in the fridge. It will last for about three days!
How long does it last?
Cooked corn will usually stay fresh for 3-5 days in the refrigerator, but trust me, it’s best enjoyed freshly made!
A Cozy Closing Note
Corn on the cob is more than just a side dish; it’s a heartwarming reminder to savor the small joys of life. This enchanting recipe invites you to experience summer in each tender bite. Whether you’re hosting a joyous gathering or enjoying a quiet evening at home, don’t miss your chance to whip up this delightful dish. Save this Corn on the Cob to your Pinterest board so it’s ready when you need a cozy treat!
Print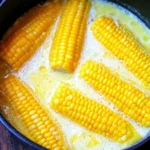
Cozy Corn on the Cob
- Total Time: 12 minutes
- Yield: 4 servings
- Diet: Vegetarian
Description
A delightful recipe for tender, juicy corn on the cob, celebrating summer flavors with a touch of butter and salt.
Ingredients
- Fresh corn on the cob
- Butter
- Salt
Instructions
- Bring a large pot of water to a boil.
- Add the corn and cook for about 5-7 minutes until tender.
- Remove the corn and let it cool slightly.
- Slather with melted butter and sprinkle generously with salt before serving.
Notes
For a dairy-free version, try using your favorite plant-based butter. Leftover corn can be stored in the fridge for up to three days.
- Prep Time: 5 minutes
- Cook Time: 7 minutes
- Category: Side Dish
- Method: Boiling
- Cuisine: American
Nutrition
- Serving Size: 1 ear of corn
- Calories: 90
- Sugar: 2g
- Sodium: 75mg
- Fat: 4g
- Saturated Fat: 2g
- Unsaturated Fat: 2g
- Trans Fat: 0g
- Carbohydrates: 19g
- Fiber: 2g
- Protein: 3g
- Cholesterol: 0mg