Warm and Comforting Old Fashioned Yeast Rolls
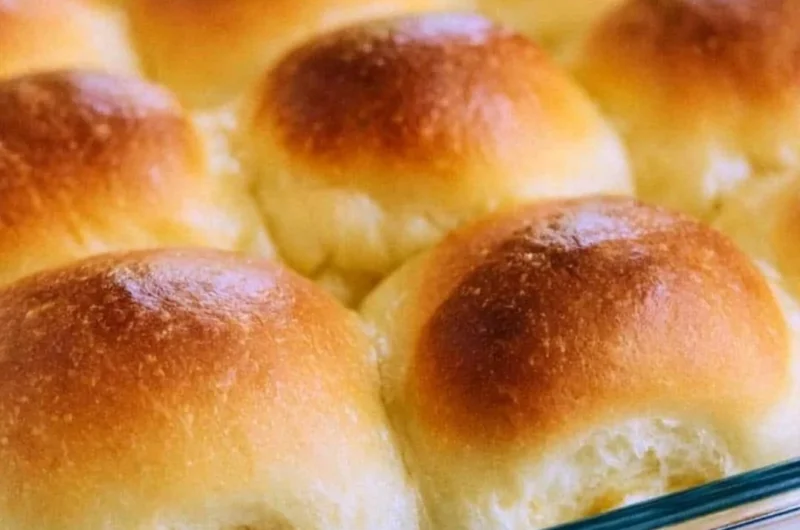
There’s something undeniably magical about the aroma of freshly baked bread wafting through the kitchen. As the warmth embraces you and the golden-hued rolls cool on the counter, memories of family gatherings, cozy evenings, and holiday celebrations come rushing back. These Warm and Comforting Old Fashioned Yeast Rolls are a true slice of nostalgia that will transport you back to simpler times, infused with the love that only homemade bread can bring. Picture this: soft, fluffy rolls bursting with flavor, waiting to be slathered with butter or used to mop up delicious gravy. They’re the perfect addition to any easy weeknight dinner or festive holiday meal. This is one you’ll definitely want to pin for later!
Why You’ll Love This Recipe
- Nostalgic Flavor: Experience the authentic taste of homemade bread, just like grandma used to make.
- Easy to Make: With simple step-by-step instructions, you’ll be baking like a pro in no time!
- Family-Friendly: These rolls are a crowd-pleaser, making them perfect for family dinners or gatherings.
- Versatile: Serve them alongside soups, stews, or as a delightful breakfast bread with jam.
- Customizable: You can easily add your favorite flavors or toppings for a personal touch.
- Perfect for Meal Prep: Make them ahead and freeze for those busy nights when you need a comforting side.
Ingredients You’ll Need for Warm and Comforting Old Fashioned Yeast Rolls
Gather these simple ingredients and let’s get started!
- 2 1/4 teaspoons active dry yeast
- 1/4 cup warm water
- 1/4 cup granulated sugar
- 1/2 cup milk, warmed
- 1/3 cup unsalted butter, melted
- 1 teaspoon salt
- 1 large egg
- 3 to 4 cups all-purpose flour
Let’s Make It Together
Follow these straightforward steps for baking up a batch of delightful rolls:
In a small bowl, dissolve the yeast in warm water with a pinch of sugar. Let it sit for about 5-10 minutes until frothy.
In a large mixing bowl, combine the warm milk, melted butter, sugar, and salt. Mix well until combined.
Add the egg and the frothy yeast mixture to the bowl, mixing to combine all the ingredients into a harmonious blend.
Gradually add flour, one cup at a time, mixing until a soft dough forms that gently sticks to your fingers.
Knead the dough on a floured surface for about 5-10 minutes until it becomes smooth and elastic, feeling like a soft pillow under your hands.
Place the dough in a greased bowl, cover it with a clean cloth, and let it rise in a warm place until doubled in size, about 1 hour.
Punch down the dough and shape it into rolls. Place the rolls in a greased baking dish, leaving a little space between each roll as they will puff up.
Cover and let them rise again until doubled, about 30 minutes, filling your home with an irresistible aroma.
Preheat the oven to 375°F (190°C), letting the anticipation build.
Bake for 15-20 minutes or until the rolls are golden brown, calling you closer with their enchanting scent.
Brush with melted butter before serving, adding an indulgent touch that will make everyone swoon.
Fun Ways to Customize It
Feel free to get creative! Here are some delicious variations to try:
Garlic Parmesan Rolls: Add minced garlic and grated Parmesan cheese to the dough for a savory twist that’s perfect for garlic bread lovers.
Herb-Infused Rolls: Mix in fresh herbs like rosemary or thyme to elevate the flavor of your rolls, adding a fragrant aroma to your meal.
Cinnamon Sugar Rolls: Before shaping the rolls, sprinkle cinnamon and sugar into the dough for a sweet treat that’s perfect alongside coffee or tea.
Cheese-Stuffed Rolls: For an indulgent bite, tuck a small piece of your favorite cheese into the center of each roll before baking.
Chef Emma’s Helpful Tips
Make-Ahead Advice: Prepare the rolls up to the point of the first rise. Punch the dough down, shape, and freeze them. On baking day, allow them to rise, then bake straight from the freezer!
Ingredient Swaps: If you’re out of milk, you can use almond milk or any milk alternative—just warm it gently before adding.
Slicing Tricks: Use a sharp serrated knife to slice your rolls for a beautiful presentation if you’re serving them at a gathering.
Storage Suggestions: Store leftover rolls in an airtight container for up to three days. They also freeze beautifully, so you can enjoy them later!
What’s Inside – Nutrition Breakdown
- Serving Size: 1 roll
- Calories: 150
- Carbohydrates: 25g
- Sugar: 5g
- Fat: 5g
- Protein: 3g
- Sodium: 150mg
Frequently Asked Questions
Can I make this ahead?
Absolutely! You can prepare the dough up to the first rise, then shape and freeze the rolls for baking later.
Can I use different ingredients?
Yes! Almond milk and whole wheat flour can be used for different flavors, but be mindful that the texture may vary.
How do I store leftovers?
Place leftover rolls in an airtight container at room temperature. They’re best enjoyed fresh but can be stored for up to three days.
How long does it last?
These delicious rolls are best enjoyed within a few days, but you can freeze them for up to three months!
A Cozy Closing Note
Baking these Warm and Comforting Old Fashioned Yeast Rolls is not just about creating a dish; it’s about crafting cherished moments and memories over shared meals. Whether they become part of your holiday traditions or a staple for easy weeknight dinners, they’re sure to warm hearts and homes alike. Save this recipe to your favorite Pinterest board so it’s ready when you need a cozy treat! Happy baking!